

Facebook is still popular, with around
3 billion users logging in each month
, but there’s no doubt some are there for a single purpose: to delete their account.
If you’ve decided you can no longer be associated with a platform that has struggled to effectively manage
hate speech
and
misinformation
, are just learning about whistleblower Frances Haugen’s scorching 2021 testimony before a Senate subcommittee, or simply have no use for the social network anymore, it’s fairly easy to back up your data and leave Facebook behind.
When you do, you’ll also lose access to Messenger, but not
Meta
‘s other apps. If you want to deactivate Instagram or delete WhatsApp, you’ll have to do so separately. And if you’ve linked Facebook to any other services, you won’t get locked out forever, but you’ll need to use a different login method the next time you open them up.
Consider downloading all your Facebook data first
Before you pull the plug, you may want to save all the data you’ve amassed on the platform throughout the years. Of course, you can skip this and immediately delete your Facebook account (
steps below
), but we think it’s better to download everything and not need it than to trash it all and wish you hadn’t. You can do this from the mobile app or a web browser.
Facebook knows a lot about you, so you won’t get your data immediately—it may be several days before the file or files are ready for you. Once it’s done, though, Facebook will let you know via email.
It’s a time-sensitive matter too: The files are large, so Facebook will only hang onto them for a few days before they delete them. If the download window closes on you, you’ll have to start the process again.
Download your Facebook data from a browser
Screenshot: Facebook
1.
From your Facebook
profile
, click your
profile picture
in the top right corner of the screen, then hit
Settings & privacy
, followed by
Settings
. This should bring you directly to
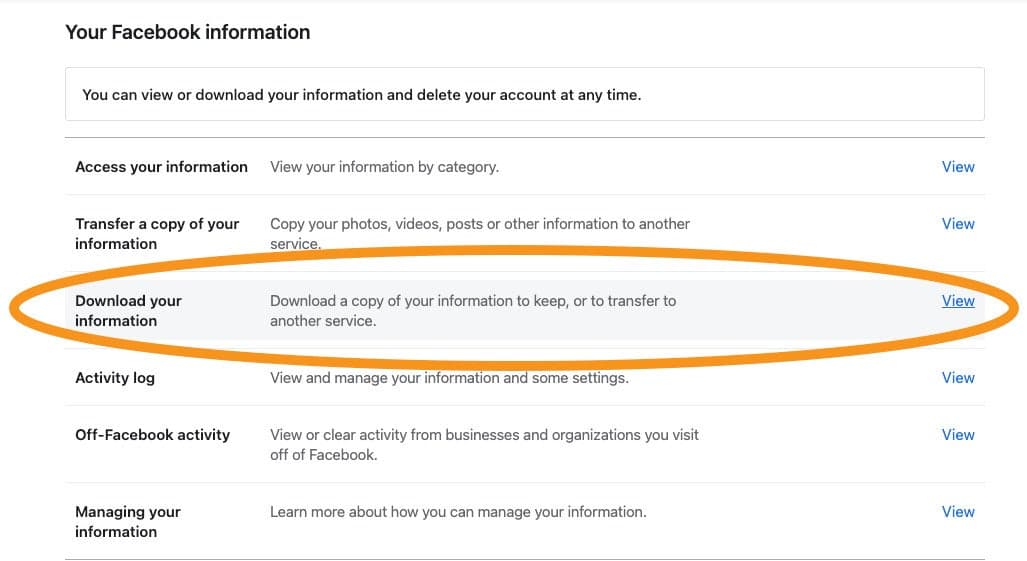
Your Facebook information
, where you’ll see several options.
2.
Find
Download profile information
, then click
View
to its right. This will bring you to a page where you can customize exactly how much you actually want to save.
Screenshot: Facebook
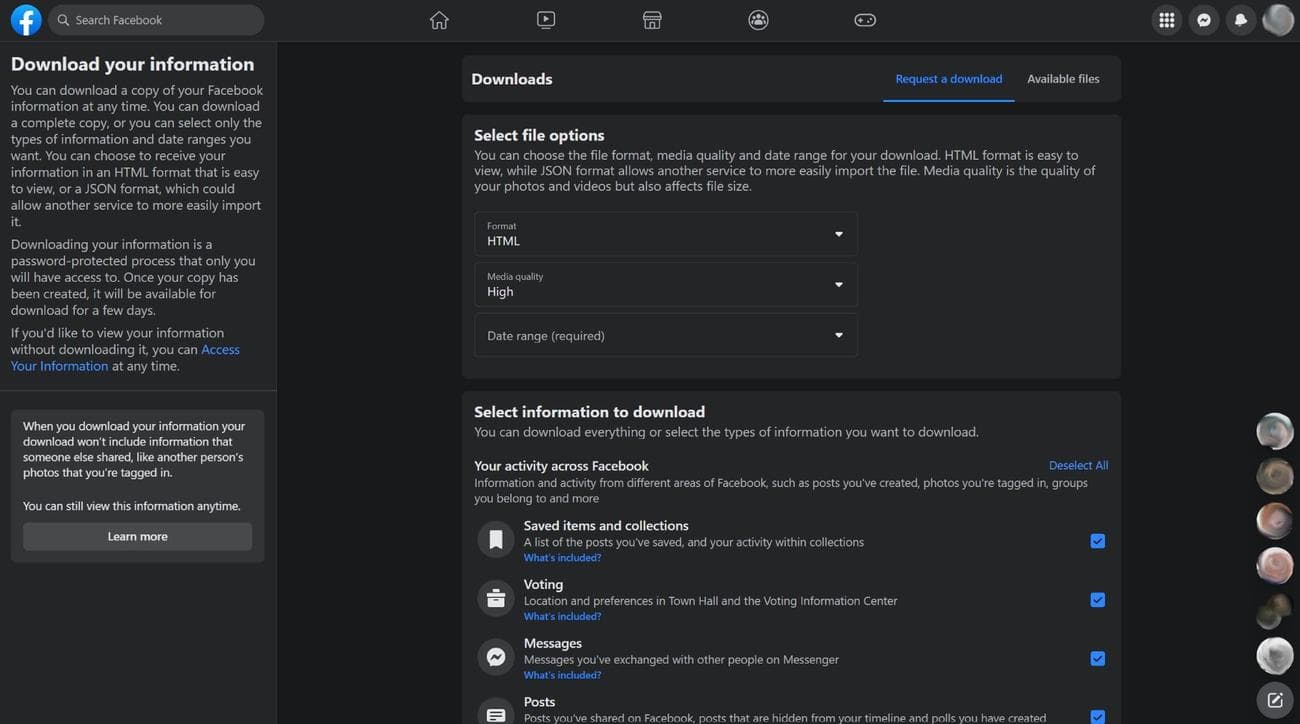
3.
Select a file format:
HTML
or
JSON
. The latter is better if you want to transfer your data somewhere else.
4.
Use the dropdown menu under
Media quality
to decide if you want to save photos and
videos
at
High
,
Medium
, or
Low
quality. Higher-quality media will increase the size of the final data file.
Screenshot: Facebook
5.
Choose a date range. You can select one of Facebook’s preset time periods (like
Last week
and
Last year
), but if you have a specific range in mind you can pick
Custom
to set your own
Start date
and
End date
. If you want to download everything, click
All time
.
[Related:
How to uncover what Facebook knows about you
]
6.
Select the type of information you want to save. There are a lot of categories, including Messenger conversations, posts, polls, places, events, searches, and ad data, and everything on this incredibly long list of items is selected by default. You can grab it all or pick and choose what you want to take with you by clicking the checkboxes to the right of each category.
7.
When you’re ready, click
Request a download
at the bottom of the page.
Download your data from the Facebook app
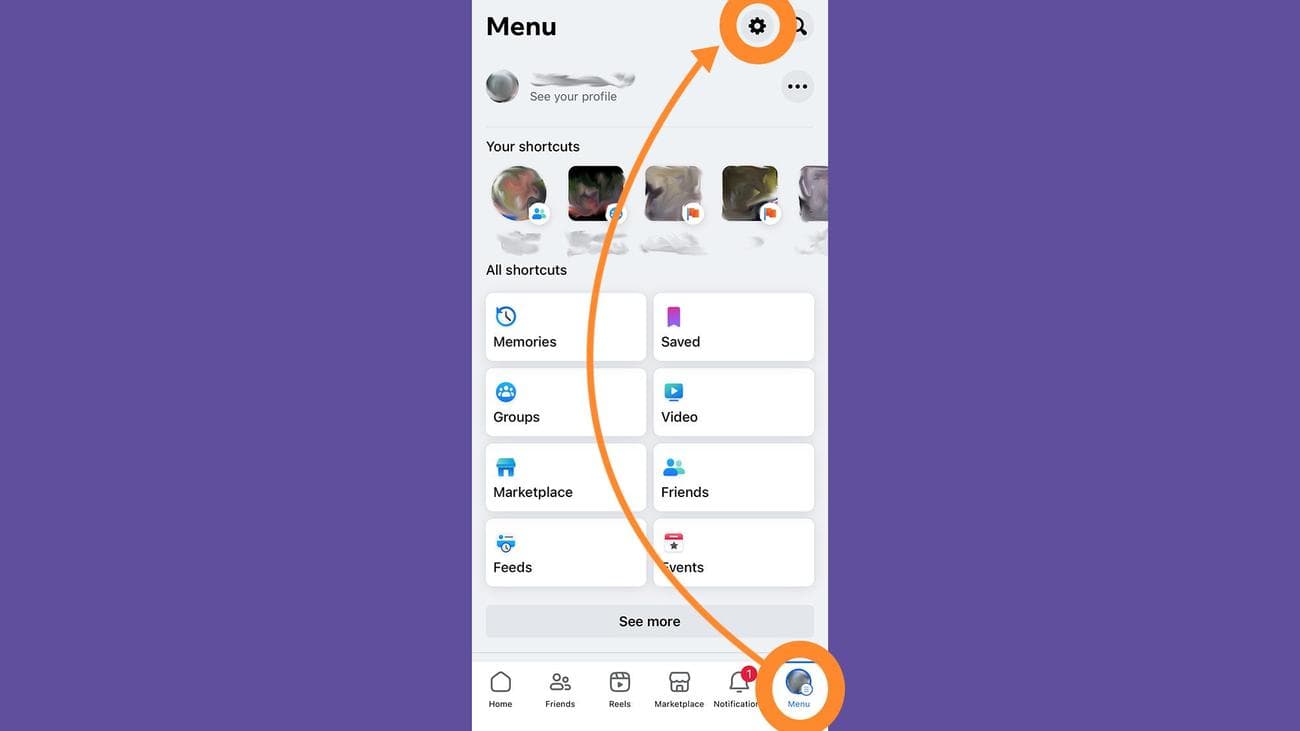
1.
Tap
Menu
in the bottom right, then the
cog icon
in the top right to open
Settings & privacy
.
Screenshot: Facebook
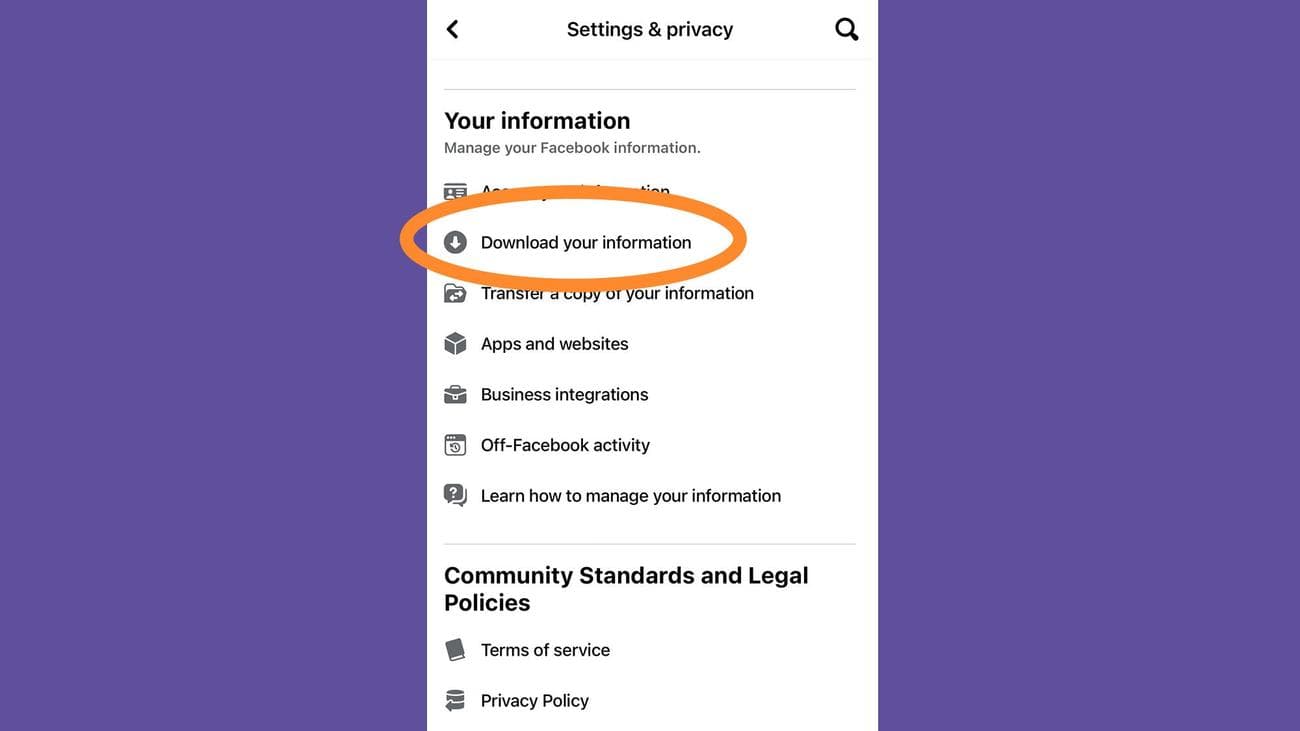
2.
Scroll down to
Your information
and tap
Download your information
.
Screenshot: Facebook
3.
You’ll see a long list of data categories, including Messenger conversations, pages you’ve liked, posts, Facebook Marketplace data, login information, and your interactions with ads. Everything will be selected by default, but you can tap an item to deselect it and omit it from the final data file.
4.
Choose a date range. You only have two options here:
All of my data
and
Date range
. If you don’t want to save everything, tap the latter option, then touch the dates that appear to set beginning and end dates for the time period you want.
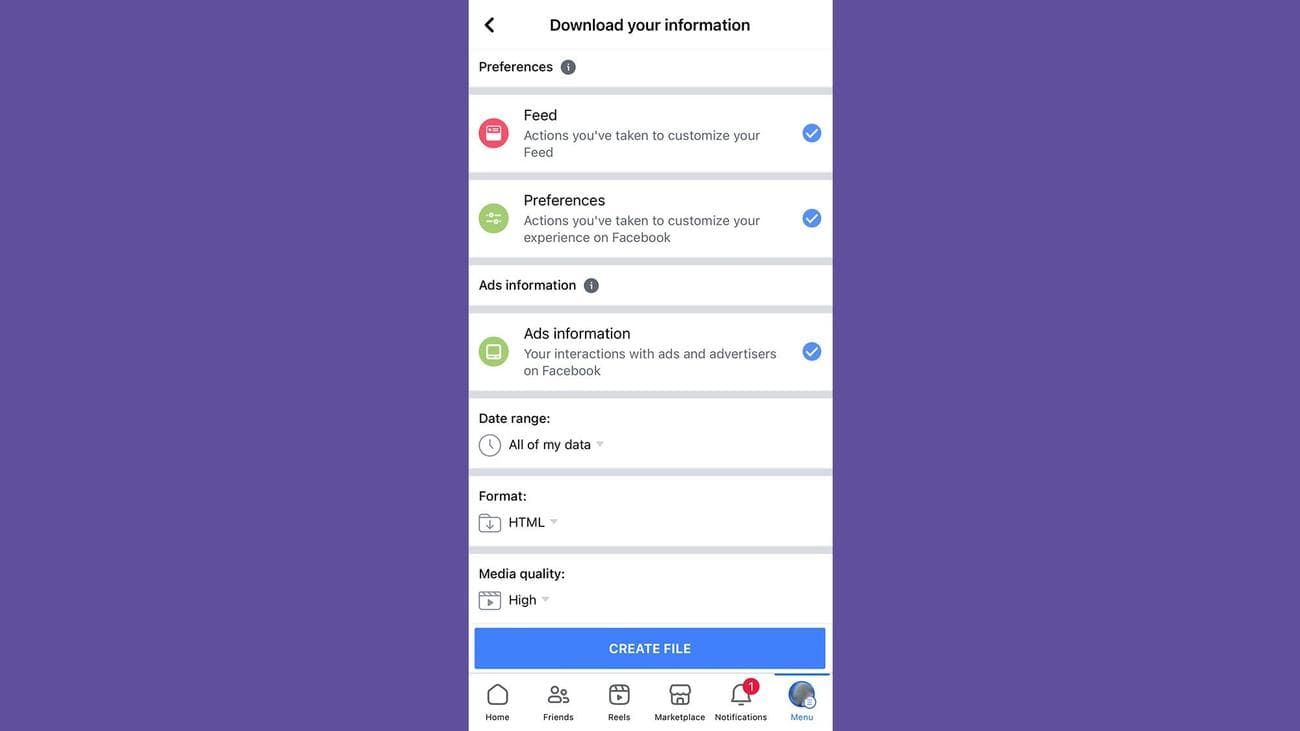
Screenshot: Facebook
5.
Pick a file format. You have two options here too:
HTML
and
JSON
. The latter is better if you want to send your data somewhere else.
6.
Decide if you want the photos and videos in your final file to be
High
,
Medium
, or
Low
quality. The higher the quality, the more sizable your download will be.
7.
Tap
Create file
to start the process.
How to delete your Facebook account on a mobile device or a computer
Whether you’ve downloaded your data and safely stored it on a hard drive or skipped straight here to erase all memory of your time on the social network, it’s time to delete your Facebook account. The process is essentially the same whether you’re using a web browser or the mobile app.
1.
Open Facebook’s settings. This is the only step that’s substantially different whether you use a browser or the app.
-
From a browser:
Go to your Facebook profile, click your
profile picture
in the top right, then
Settings & privacy
, followed by
Settings
. -
From the app:
Tap
Menu
in the bottom right, then the
cog icon
in the top right to open
Settings & privacy
.
2.
Look for the
Meta Accounts Center
. On the web, it’s in the left-hand sidebar, and in the app it’s at the top of the page. Hit
See more in Accounts Center
.
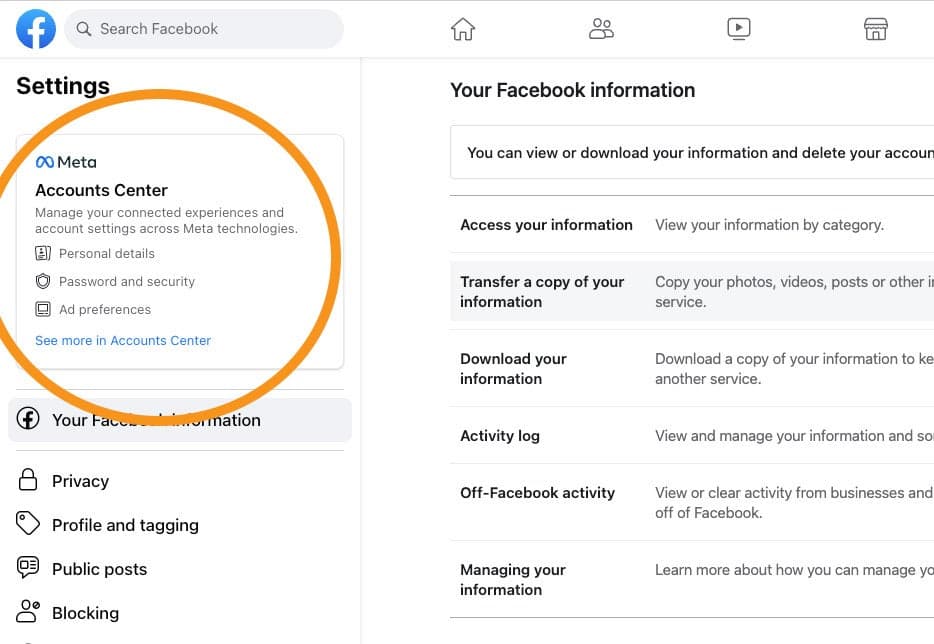
Screenshot: Facebook
3.
Click
Personal details
, then
Account ownership and control
.
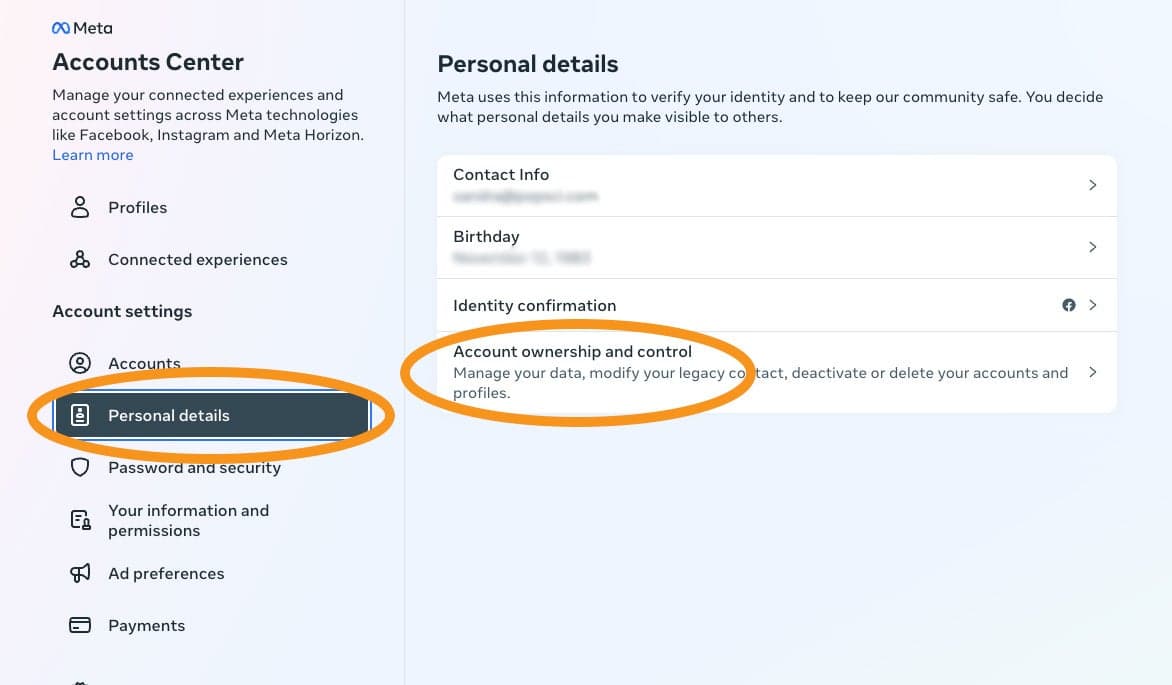
Screenshot: Facebook
4.
Choose
Deactivation or deletion
.
5.
Select your Facebook account from the list of Meta accounts that appears.
6.
Click
Delete account
. Doing so won’t immediately delete your Facebook account, but it’ll start the process. Deletion is permanent, though, and you won’t be able to get any of your Facebook data or Messenger messages back once it’s done. That said, your information will remain in Facebook’s possession (but invisible to the public) for at least 30 days. During this time you can change your mind, log into Facebook, and hit
Cancel deletion
to recover your account. After that grace period, it’ll all disappear into the internet ether.
-
Note:
Your other option here is
Deactivate account
, which will allow you to temporarily remove your Facebook account from public view. The difference between this and deleting your account is that no one will be able to see your name, photos, and most of the things you’ve shared, but you’ll still be able to use Messenger. It’s also not permanent, so you can undo deactivation whenever you want.
7.
Whether you chose to deactivate or delete your Facebook account, click
Continue
. Facebook may ask you to click through several other dialog boxes (like reminding you that deactivating or deleting your account will also shut down any pages you run) and will ask for your password one more time before it makes everything disappear.
How to delete your Facebook account without a password
As you may have noticed, you need your password to delete your Facebook account. But if you’ve forgotten it or your account has been compromised, there are some workarounds you can try.
Recover or reset your password
1.
From the Facebook login page on the web or in the app, click
Forgot password?
.
2.
Enter the email or phone number associated with the account and hit
Search
.
3.
You may see a partially-hidden email address or other information on the next screen (like
R*********@g****.com
), and that may help you remember your login information. If not, click
Try another way
.
4.
Facebook will offer you several password reset options, and they’ll vary depending on what other services you use. Choose the one that works best for you, and hit
Continue
to begin the reset process.
Report your account as fake
As a last-ditch attempt to remove your account without any login information, you can report it as fake. There’s no guarantee this will work, but you can try. And it goes without saying that you should not maliciously report an account you don’t like in the hope that it’ll be deleted. You’re better than that.
You will have to be logged into Facebook to file a report, though, so you’ll need to either create a new account to find and report your old account, or team up with a friend or family member to report it from their account. If you can’t do any of these, Facebook has an
online
form that will let you
report an imposter account without logging in
. Otherwise, follow these steps:
1.
While logged into Facebook, go to the Facebook profile you want to report (yours, in this case).
2.
Click the
three dots
under the cover photo. If you’re using a web browser, choose
Find support or report
; if you’re in the app, tap
Report profile
.
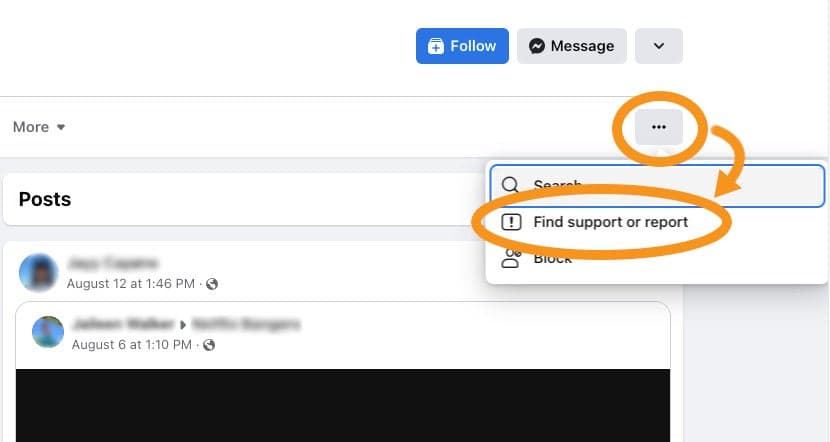
Screenshot: Facebook
3.
Select the problem you have with the account. There are several options here, but you’ll probably want to choose
Pretending to be someone
. It’s you, but the account is pretending to be someone who wants to be on Facebook, after all.
4.
Choose
Me
, and Facebook will ask if the account is violating the social network’s community standards. You can click
See Community Standards
to read up on them, or just hit
Submit
to report the account. If all goes well, Facebook will remove it from the site.
This story has been updated. It was originally published in 2021.