How to make your own Lightroom presets
Although capable Lightroom alternatives are available, most professionals stick with Adobe’s offering due to its tight integration with other company
apps
, the cloud storage that syncs photos between devices, and the long list of features that turn boring photos into mesmerizing ones. One of the convenient Lightroom features is the ability to create custom presets to speed up your editing process.
Adobe Lightroom comes with AI-based presets that identify an object or scene from the photo and show suggestions accordingly. While it works as expected and sometimes delivers stunning results without effort, professionals may want more control over how their photos look. You can create Lightroom presets on desktop
computers
, mobile devices, and the top tablets.
What can Lightroom presets do for your photography?
Before we show you how to create presets in Lightroom, let’s first understand it to clear any confusion. A Lightroom preset (often known as a Lightroom effect) is a fixed arrangement of sliders in the software. It houses a selection of edits to apply to your photos.
It’s a must-have add-on for photographers to level up the post-production editing process. It cuts down your editing hours and delivers a consistent look to your photos. However, you shouldn’t create a single present and use the same across all your pictures. Your preset selection should be based on the lighting scene, object, and other factors in your picture.
Whether you are a beginner or a pro, we recommend spending a couple of hours creating and managing Lightroom presets. You can sell your Lightroom presets online if others prefer your photography style.
Create a preset in Lightroom Creative Cloud
We use Adobe Lightroom Creative Cloud in the instructions below. The steps to create a preset in Lightroom Classic may differ.
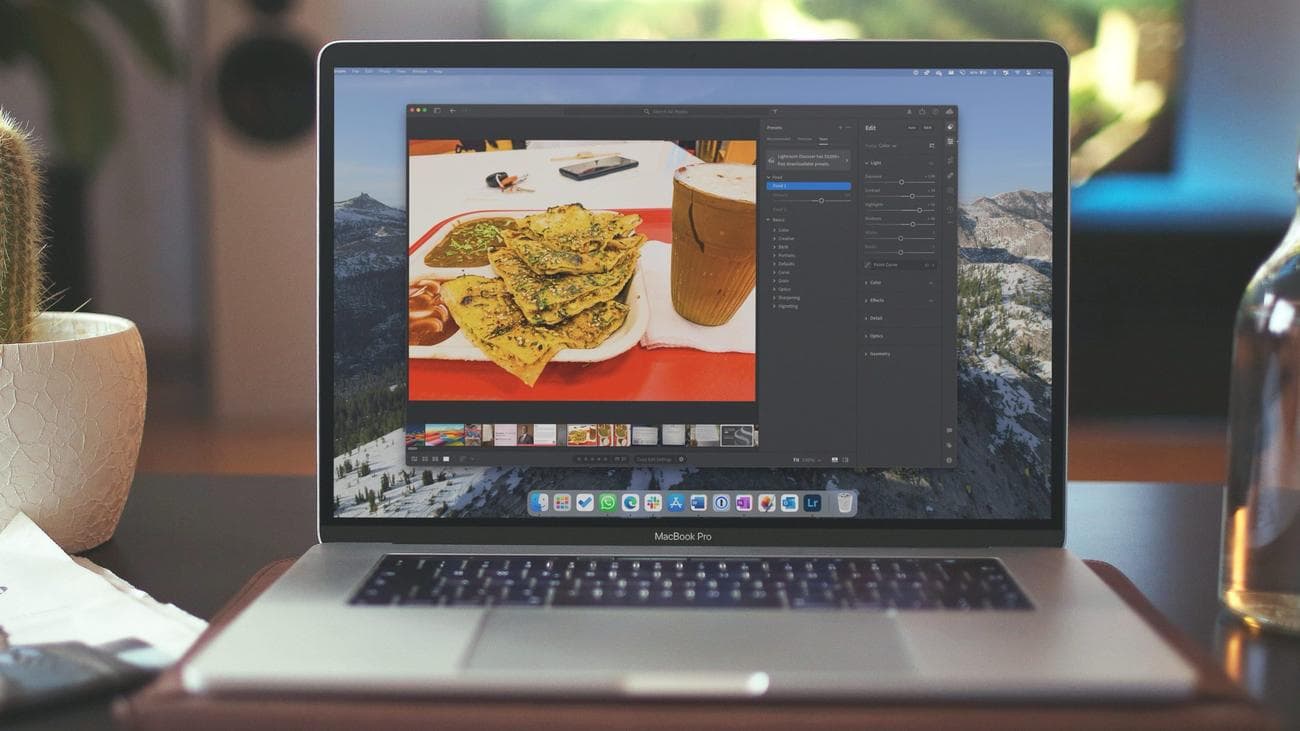
Adobe Lightroom uses the same user interface on Windows and Mac. We use Lightroom for Mac in the screenshots below. You can use the same on the Windows app to get the job done.
-
Launch
Adobe Lightroom
on your Mac or Windows PC. - Import an image to edit.
-
Select
Edit
from the sidebar and make adjustments to the photo based on how you want the preset to look. - You can tweak the light, color, effects, and details.
-
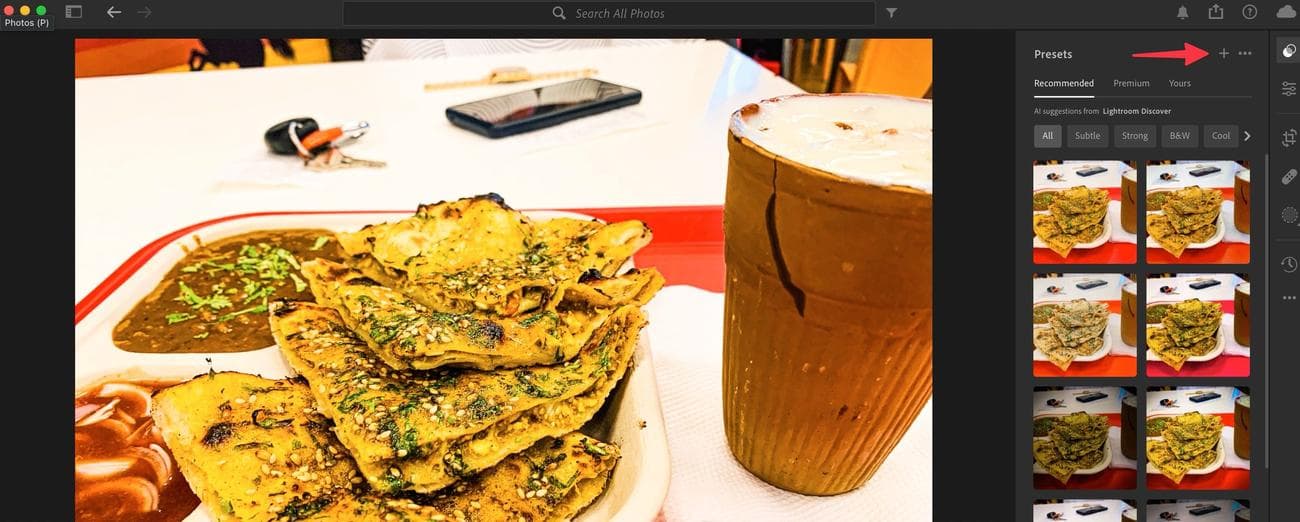
Click the
Presets
icon in the upper-right corner. On Windows, the option is under the
Edit
menu. -
Select
+
and rename your preset.
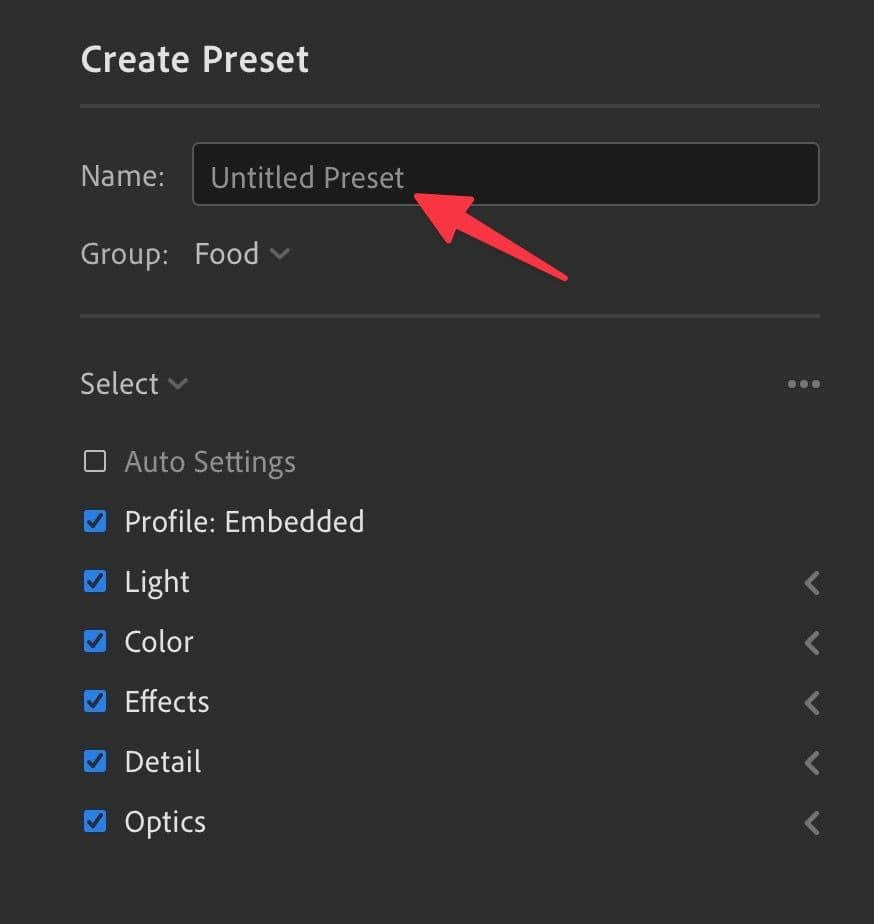
-
By default, Lightroom saves the preset in the
User Presets
group. Tap it to create a new group.
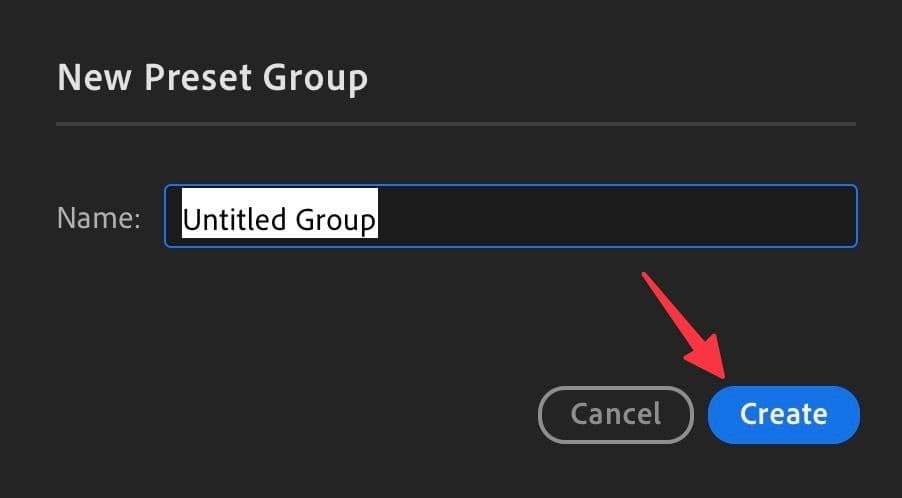
-
Give a group relevant name and select
Create
.
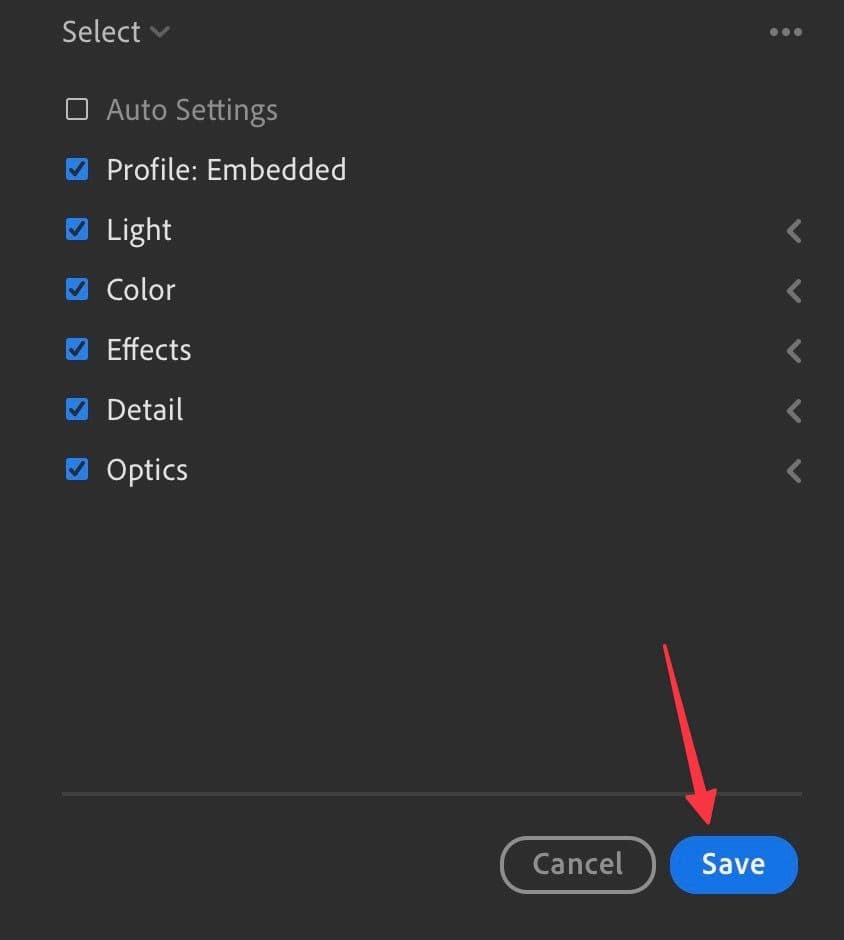
- Exclude specific details or effects.
-
Click
Save
.
You can create as many custom Lightroom presets as you want. We recommend organizing them in relevant groups to avoid any confusion.
Apply a preset to your images
Now that you’ve created a preset, check it in action using the steps below.
-
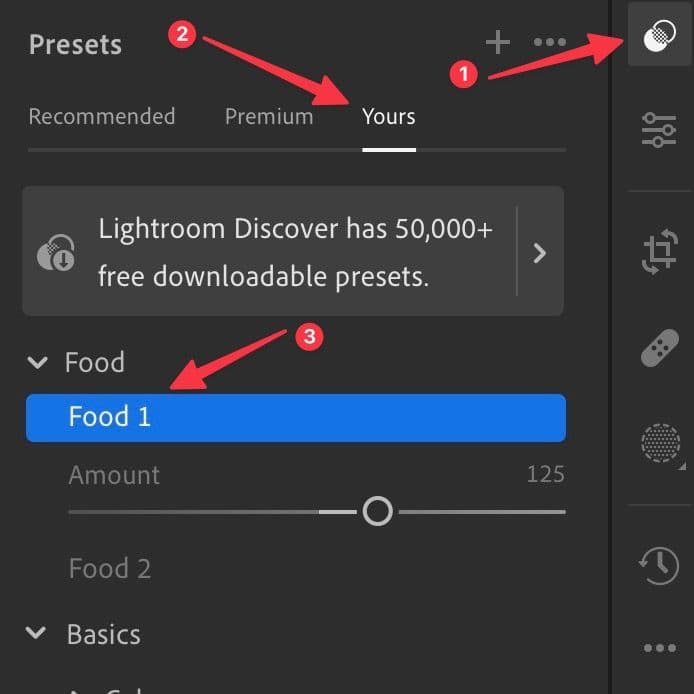
Import an image to Lightroom and select the
Presets
menu from the sidebar. -
Move to the
Yours
tab and expand a preset group. -
Select a preset you want to apply and use the slider to adjust the intensity.
Create a custom preset on Lightroom tablet apps
Thanks to the stylus and desktop-class processors, many prefer to use Lightroom on an Android tablet or iPad. The company’s tablet apps offer dozens of editing tools and the convenience of editing your photos on the go. Here’s how to create a preset from Lightroom’s tablet app:
-
Launch
Lightroom
on your Android tablet or iPad and sign in with your Adobe account details. - Import a photo you want to edit.
-
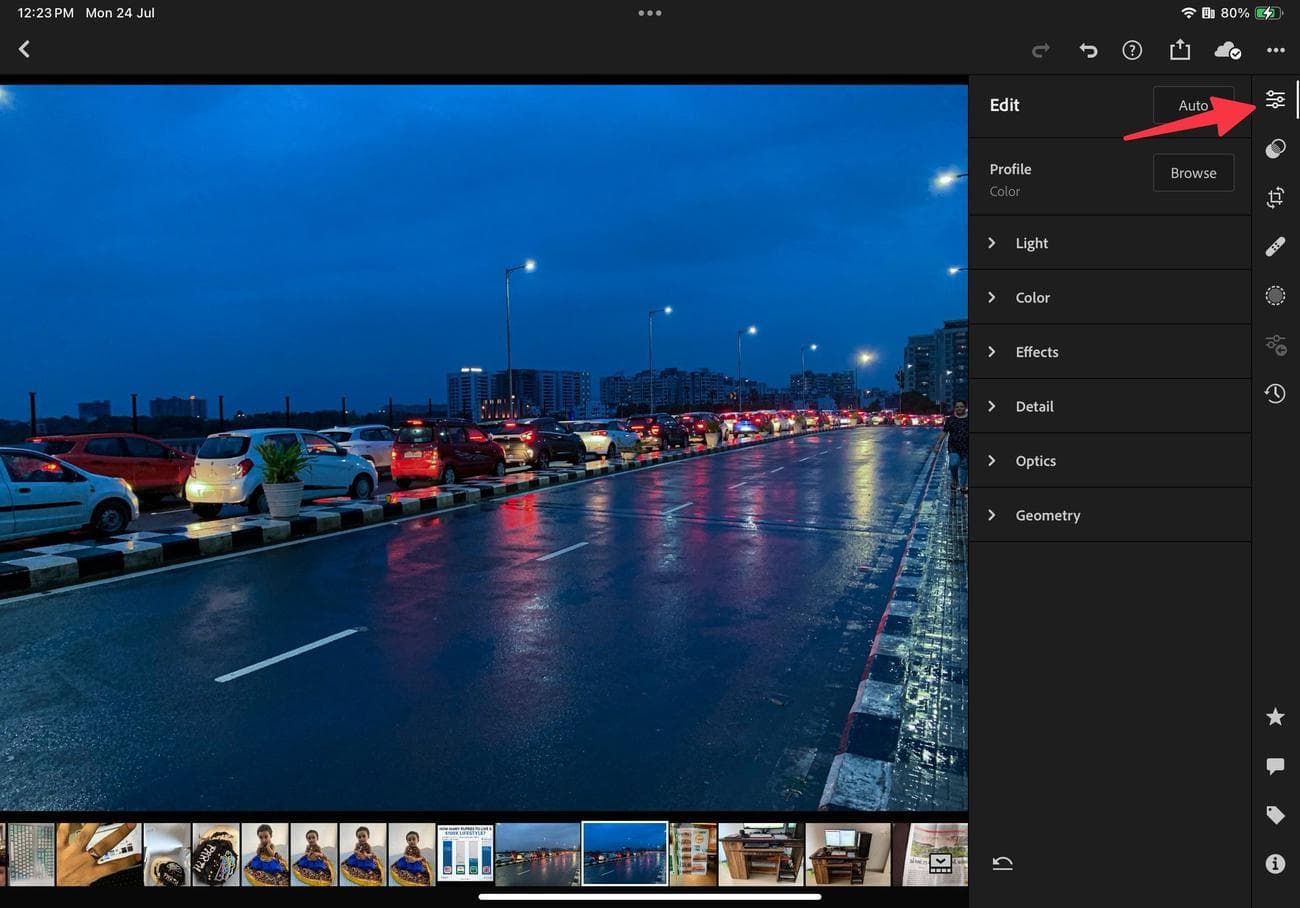
Select the
Edit
button in the upper-right corner. -
Make tweaks based on your preference. The options are similar to the Lightroom desktop app.
-
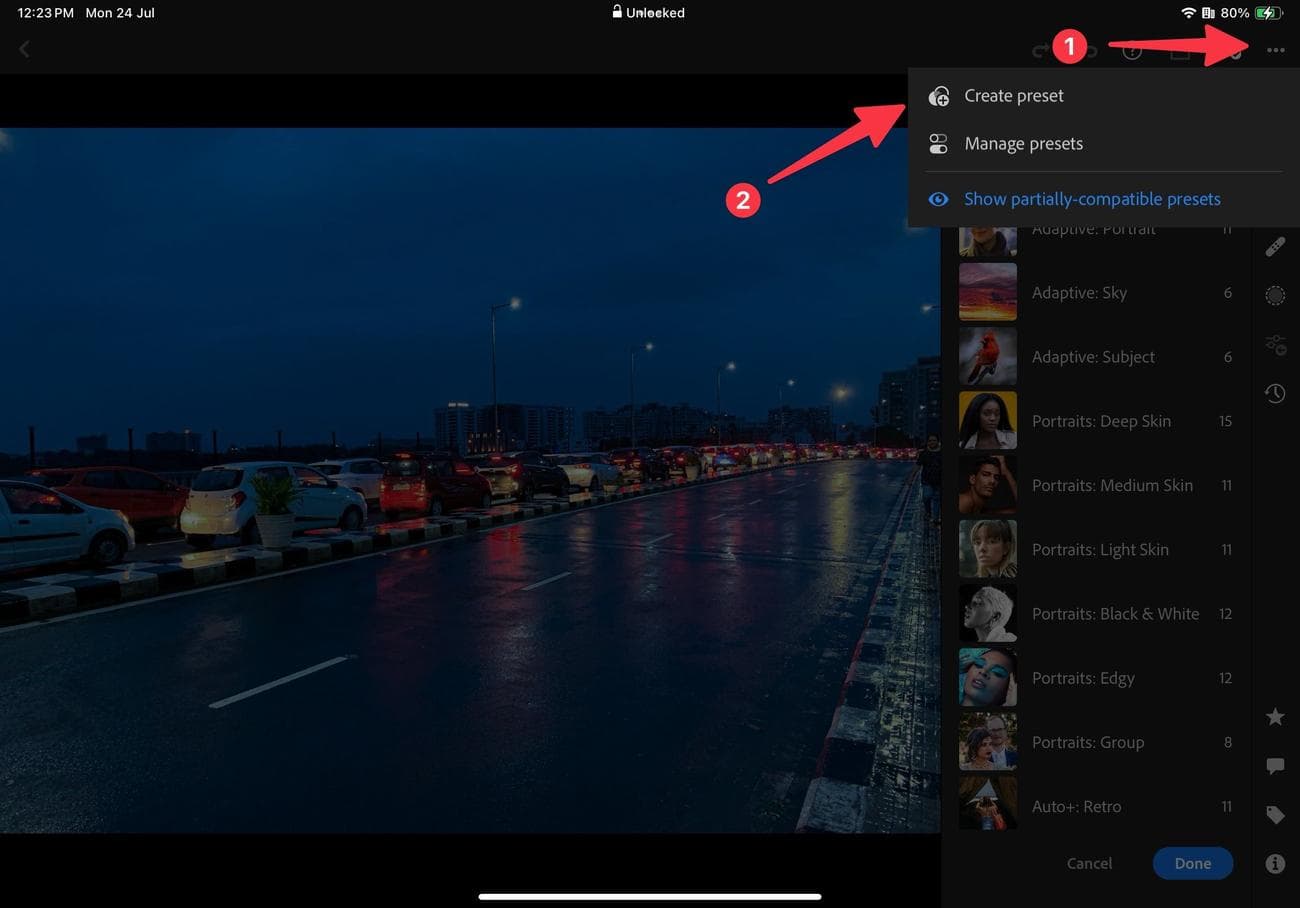
Move to the
Presets
menu and tap the
three-dot icon
in the upper-right corner. -
Select
Create preset
.
- Select a preset group or create a new one.
- Give your preset a name.
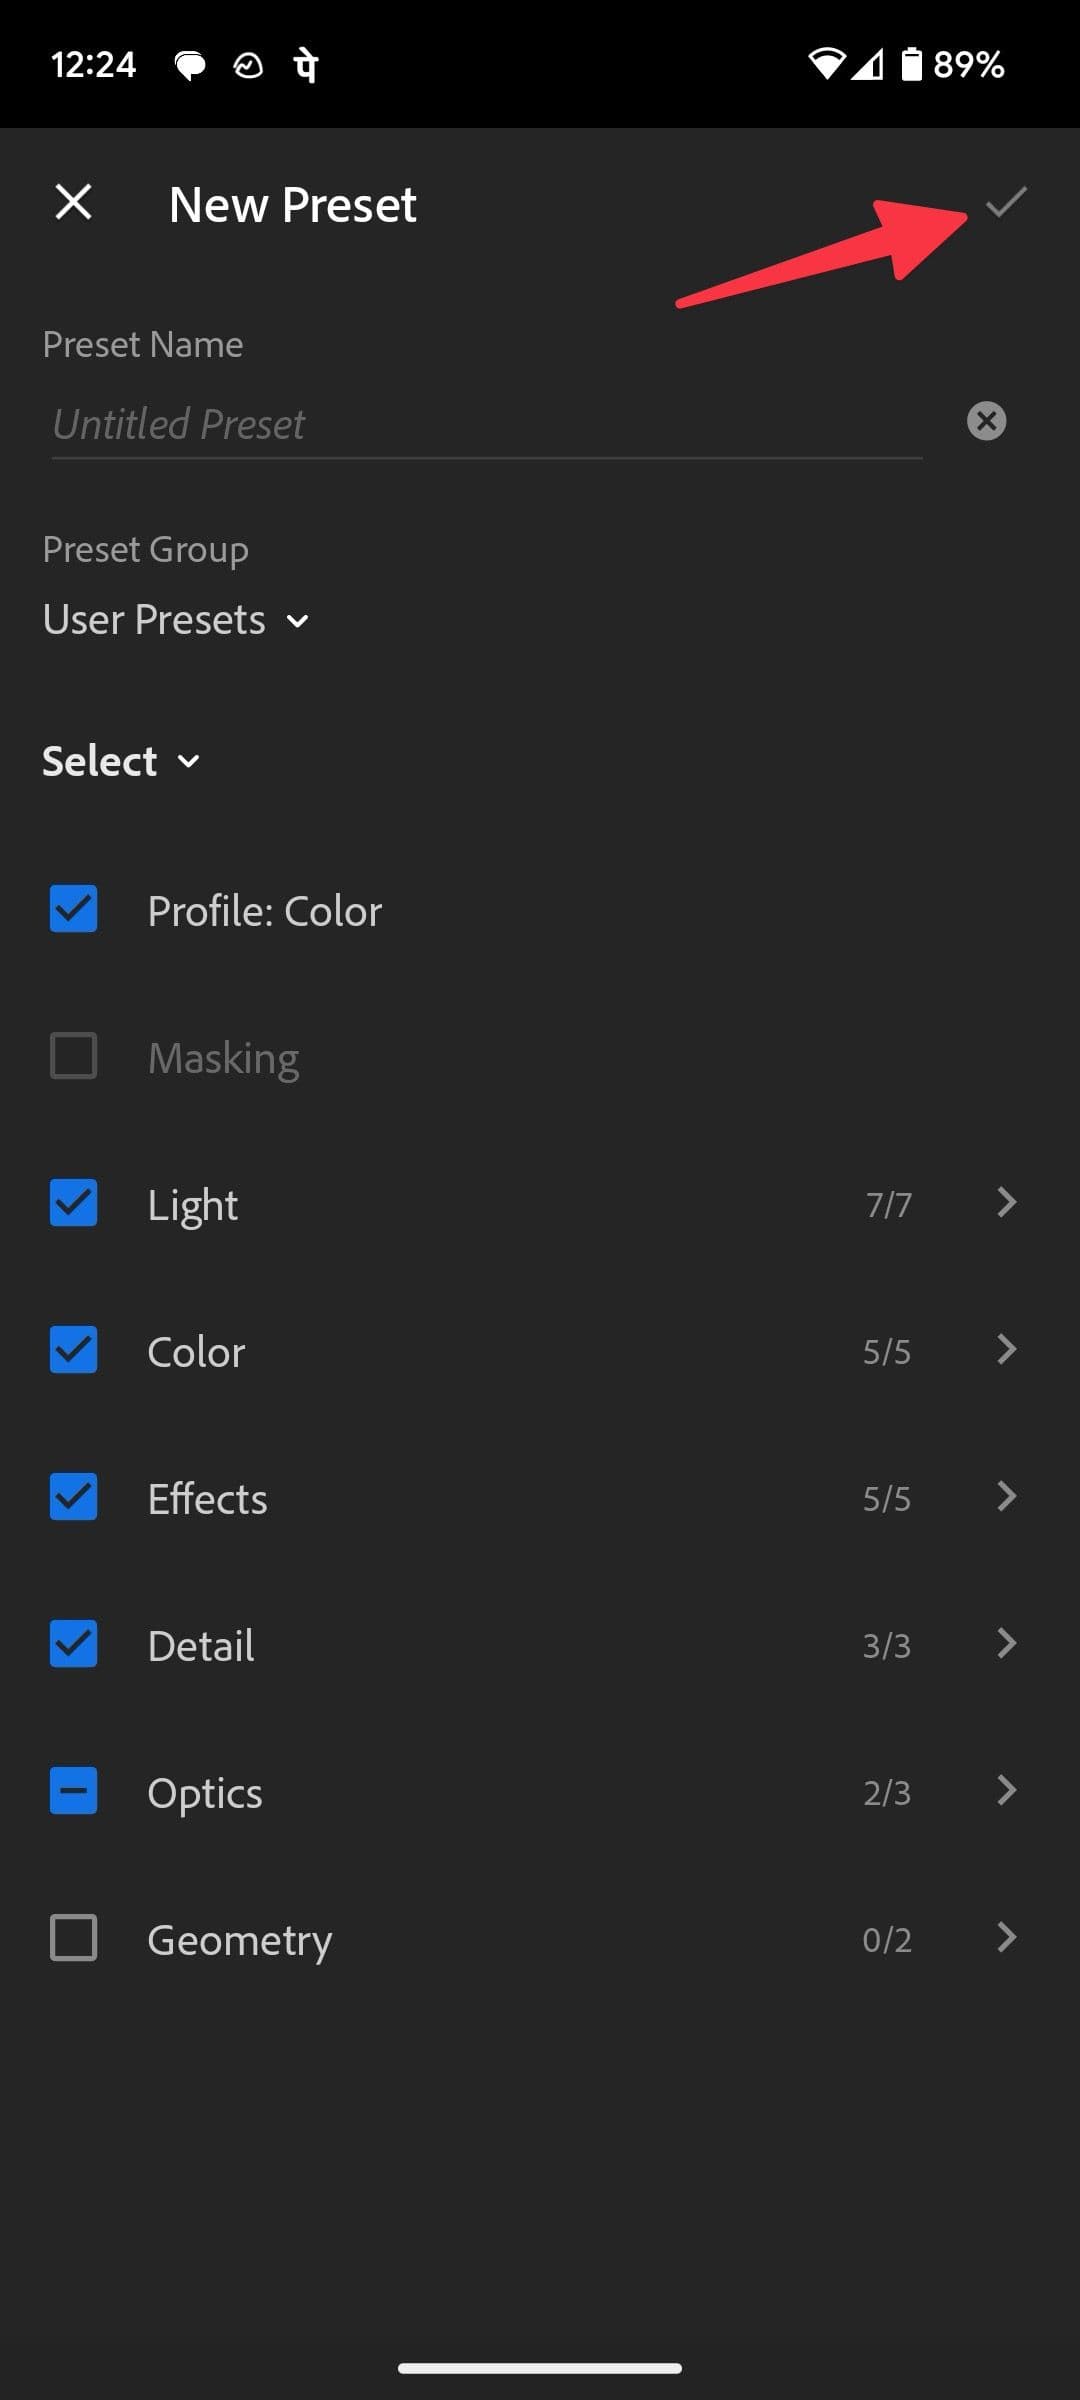
-
Tap the
checkmark
at the top.
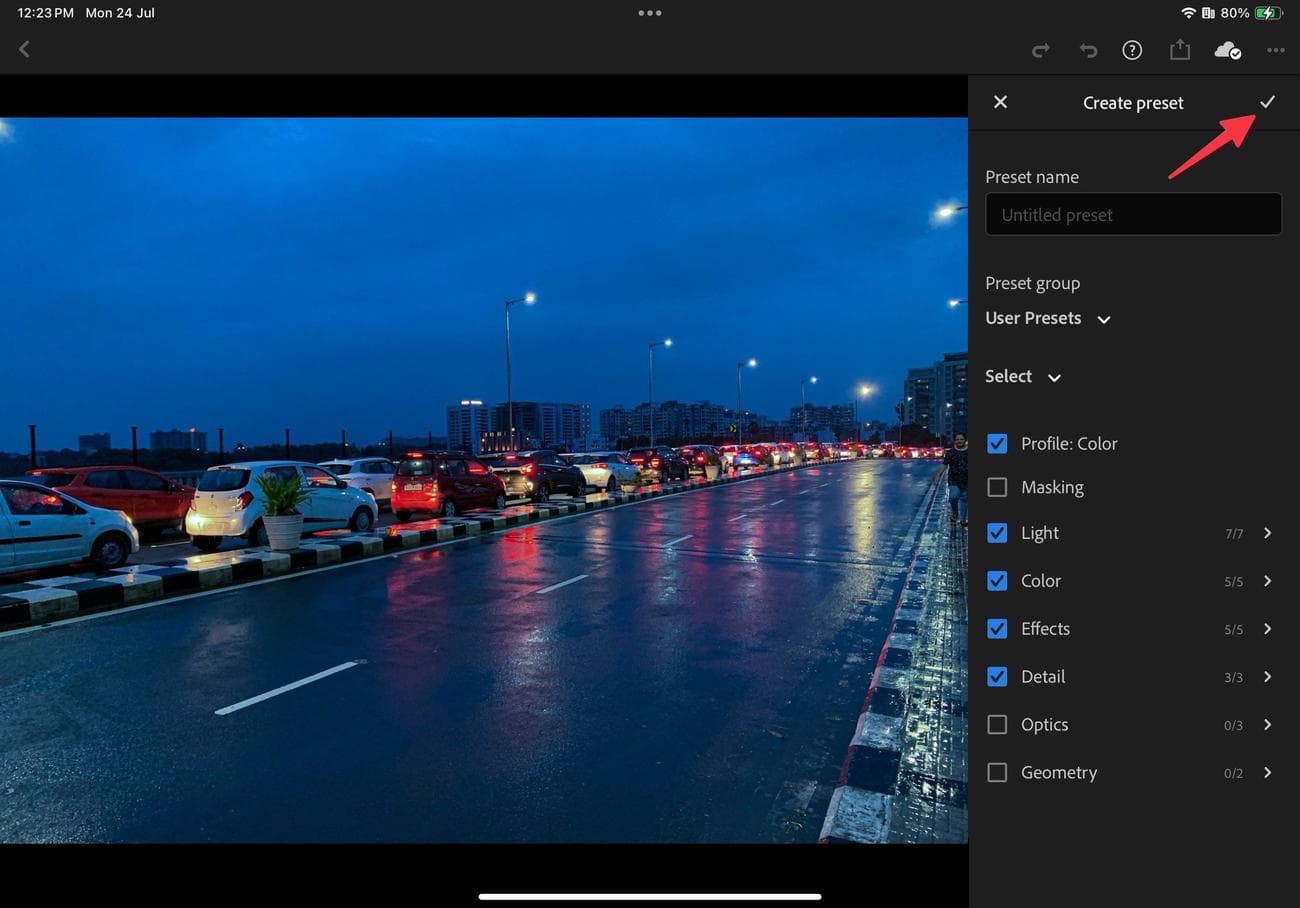
Your Lightroom preset is ready to use on all your devices.
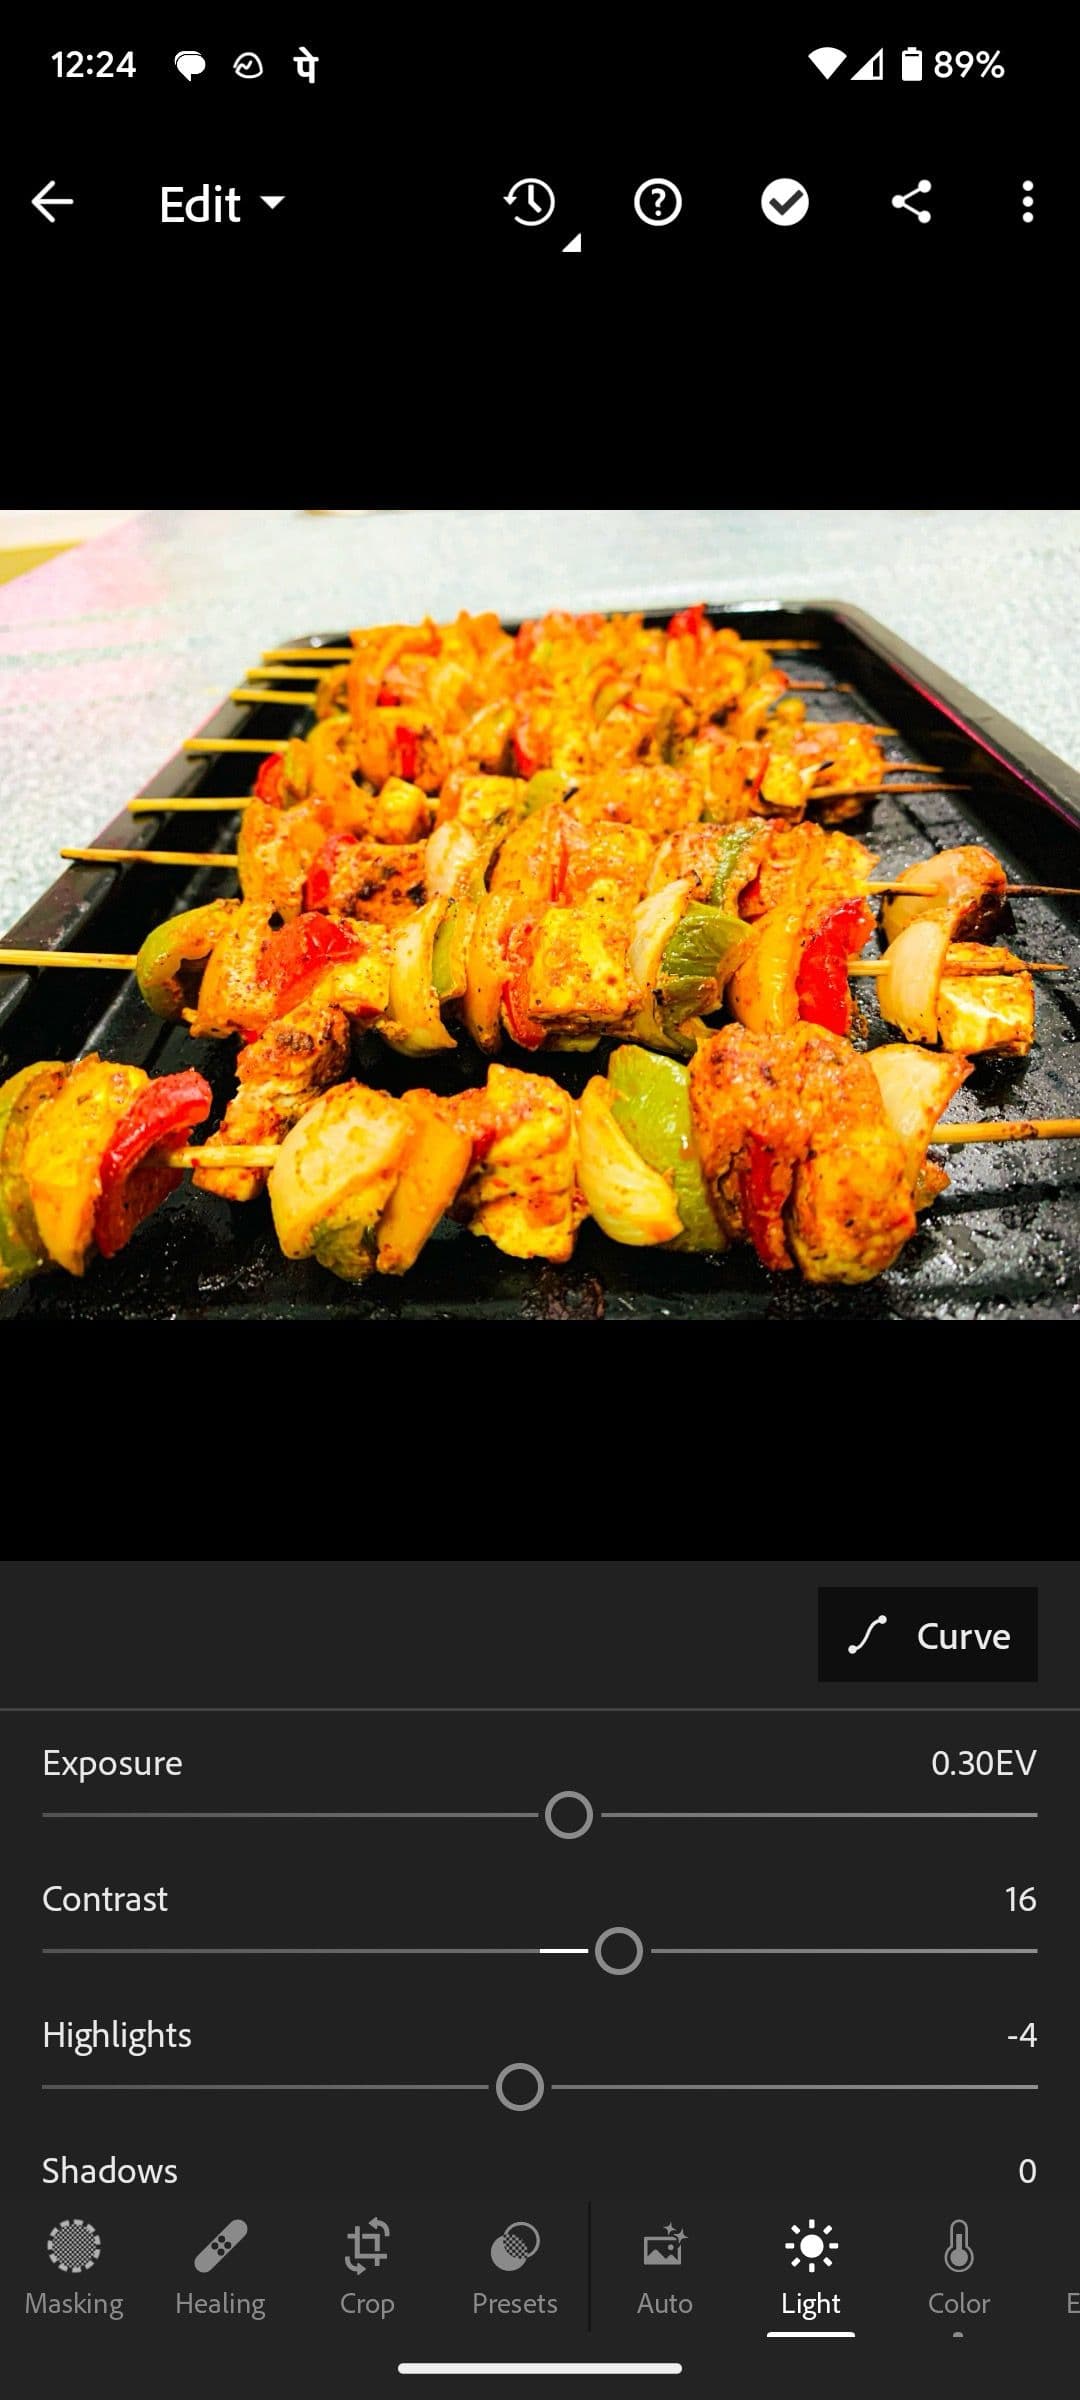
Create a personal Lightroom preset on your phone
Although the photo editing experience in Lightroom is more convenient on a big desktop or tablet screen, you can’t completely ignore the company’s mobile apps. Lightroom image editing is a breeze on the top
Samsung Galaxy
phones like the
Samsung
S23 Ultra with a stylus and foldables. You can quickly apply a preset and make it ready for sharing on Instagram or Twitter.
-
Download
Adobe Lightroom
on your phone. - Log in with your Adobe account details.
- Give it the required permission to access photos on your phone.
- Select an image to edit.
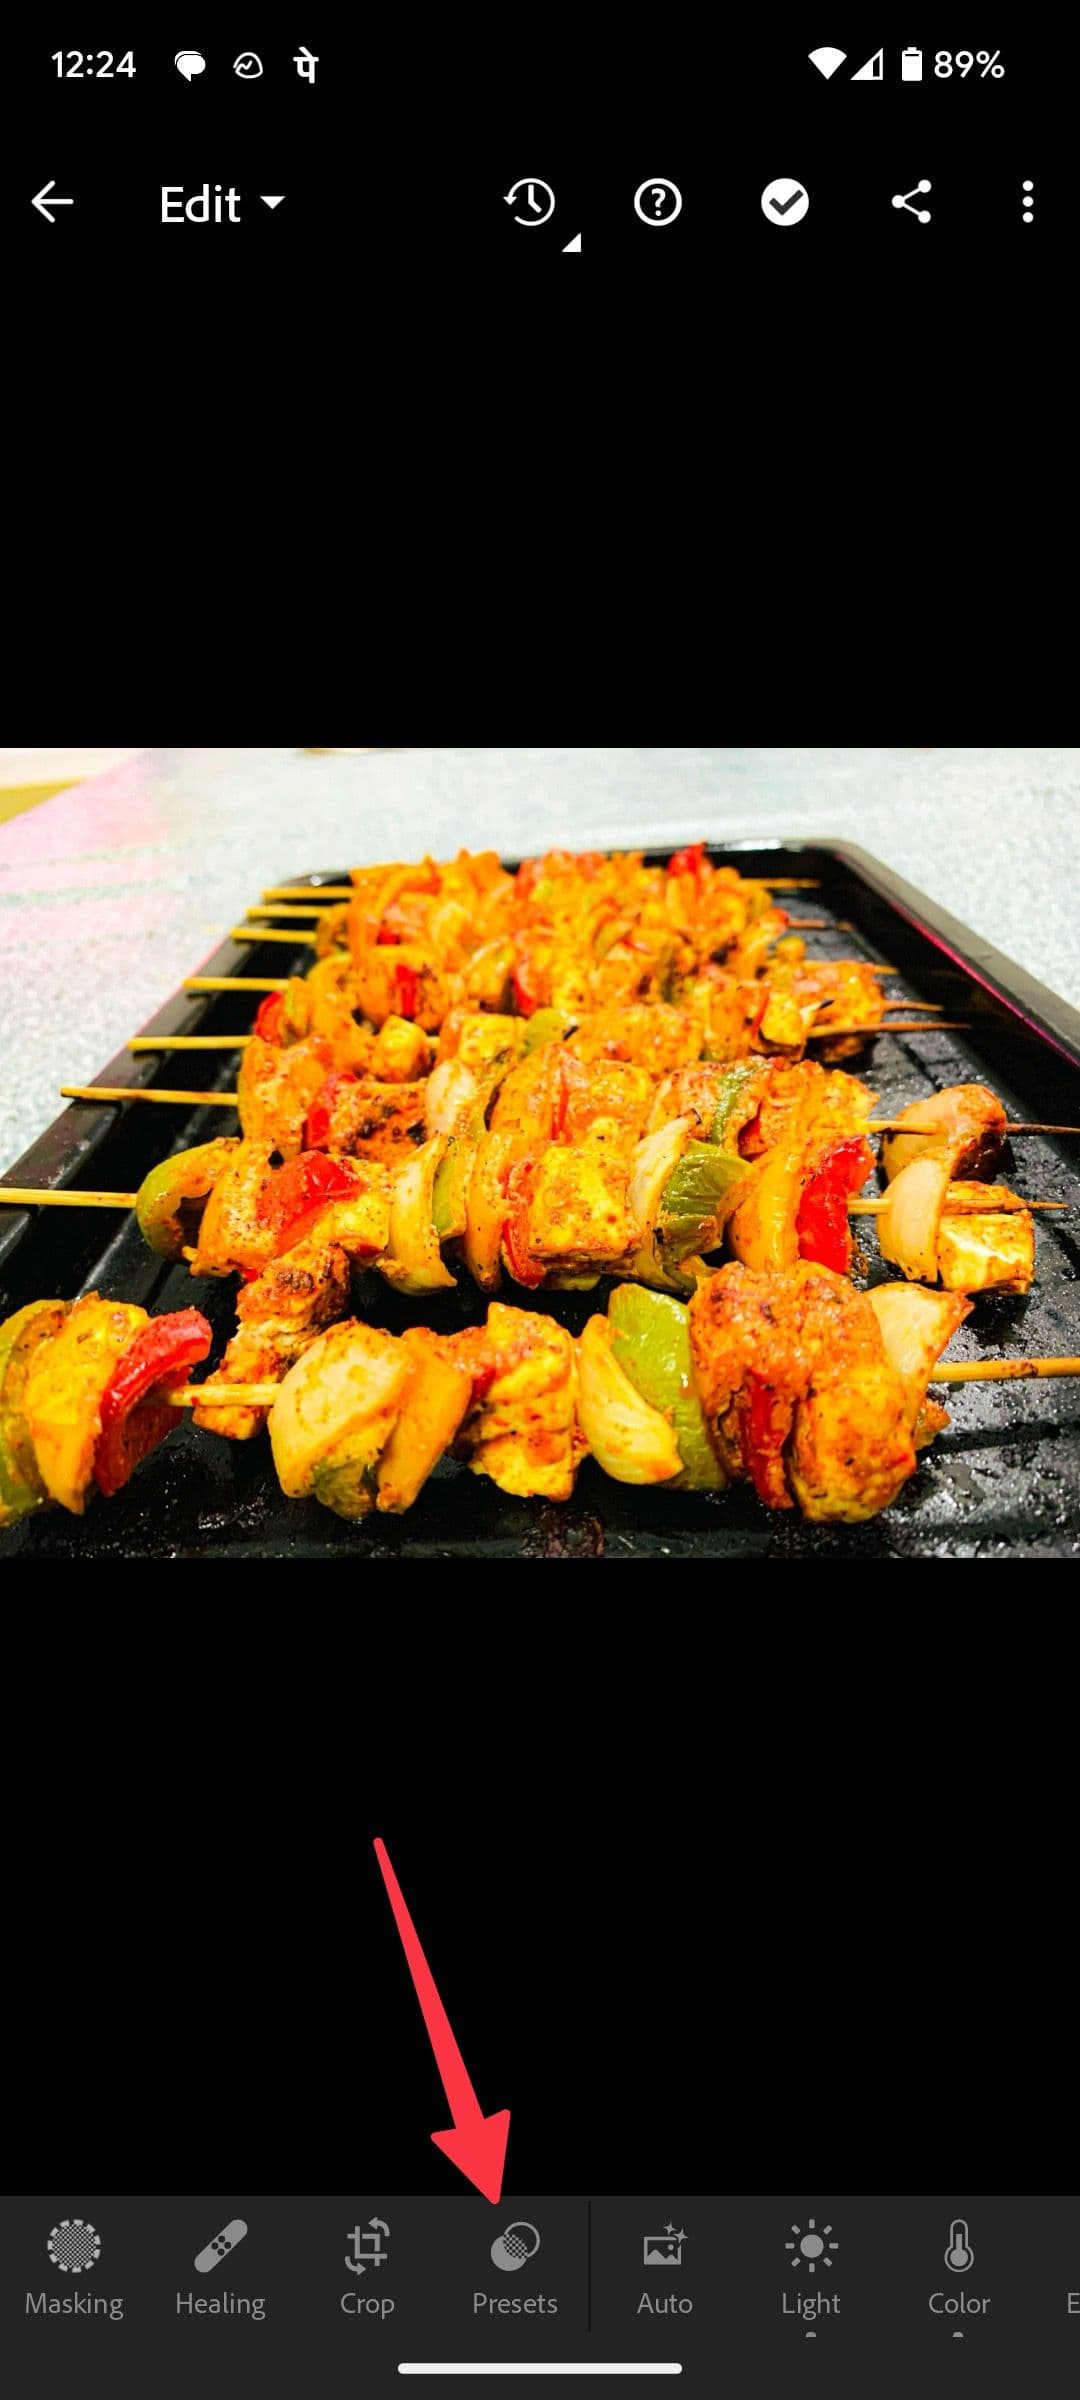
-
Once you make the necessary changes, select
Presets
.
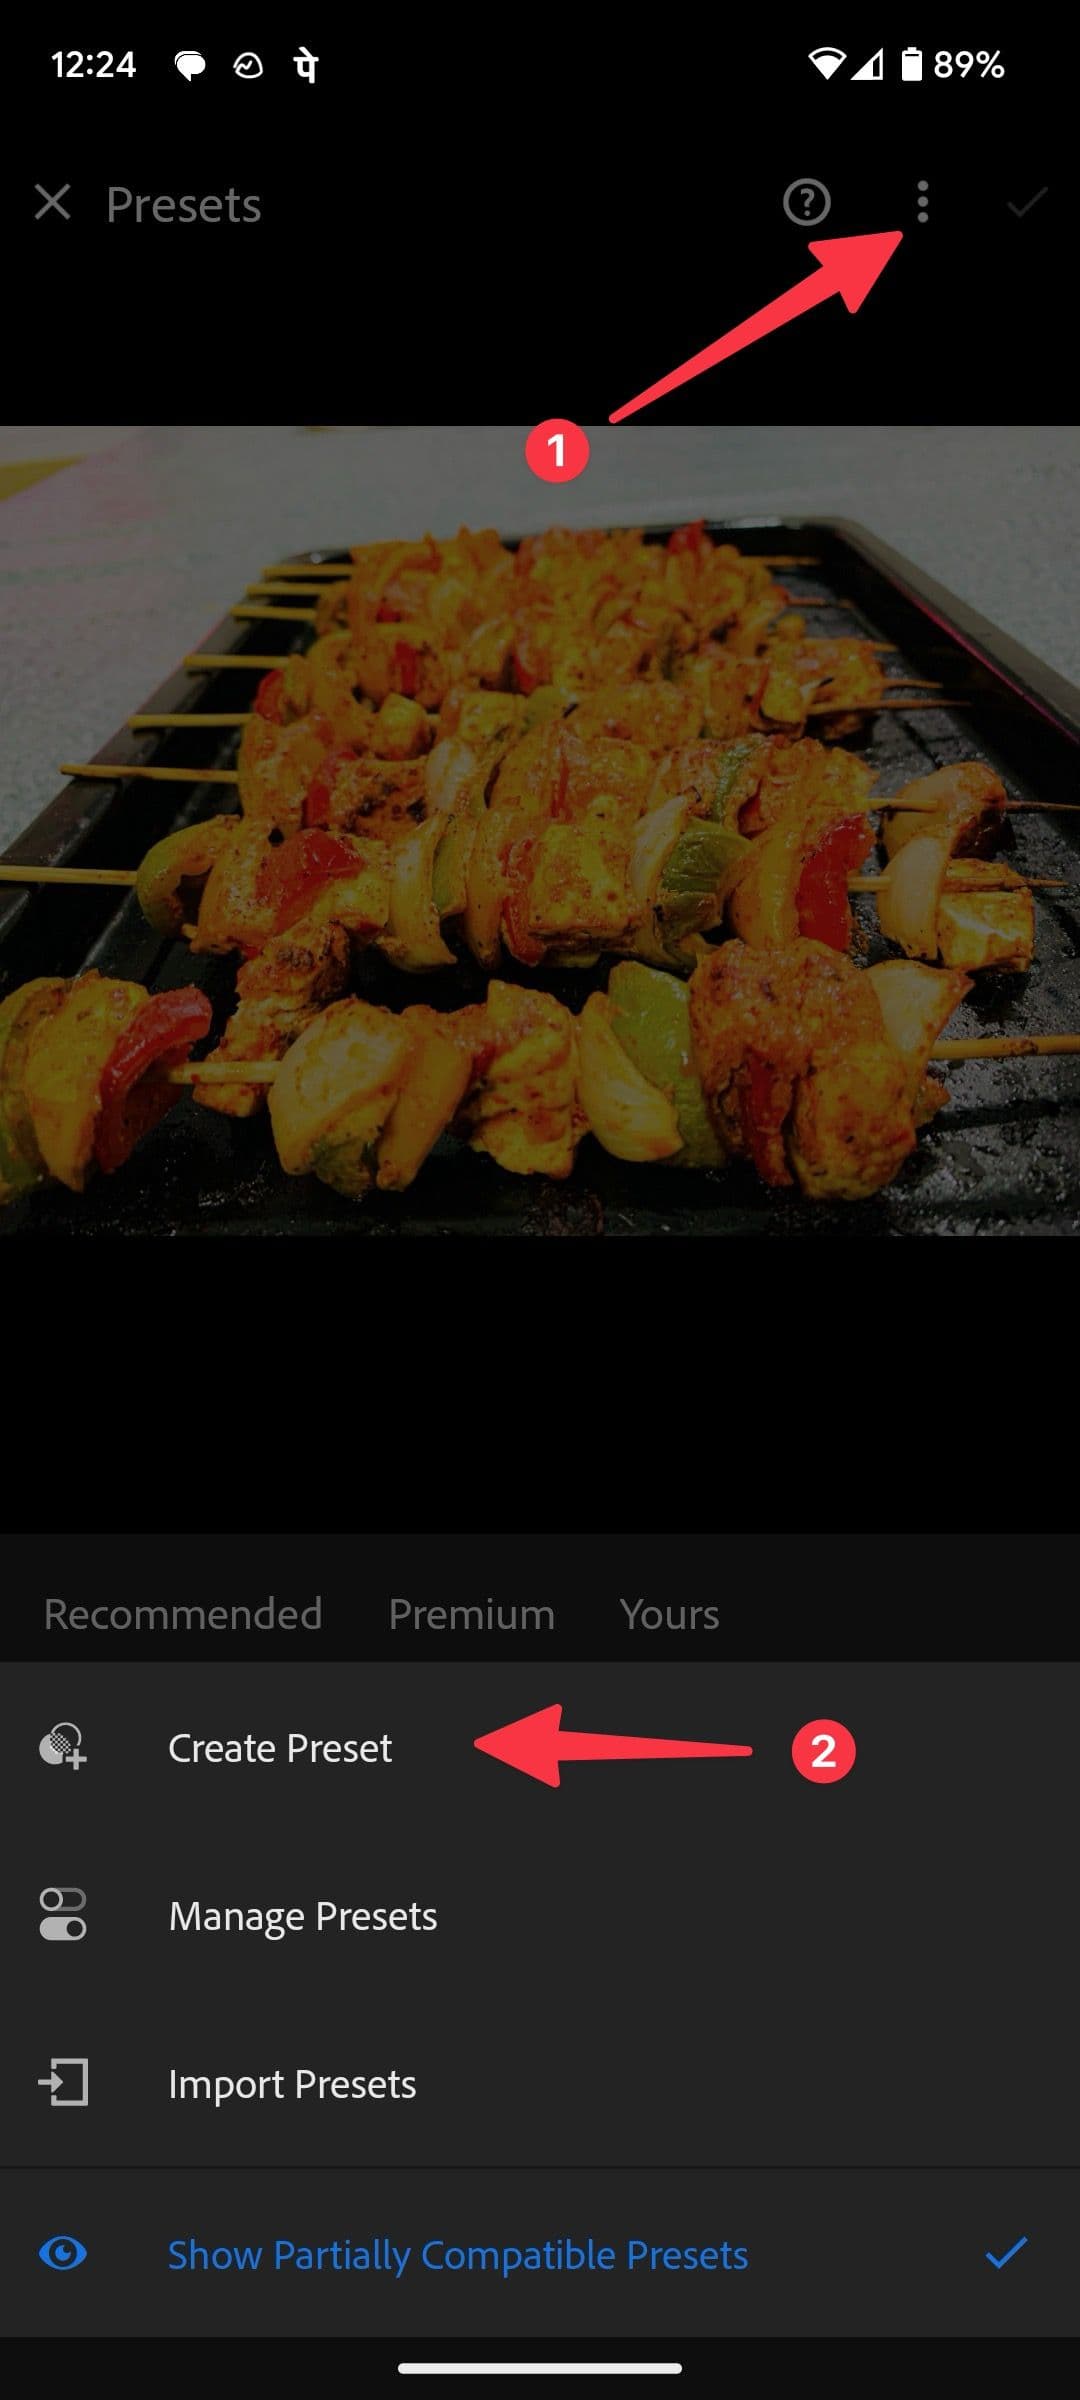
-
Tap the
three-dot menu
at the top and select
Create Preset
. -
Enter the preset name, select a relevant group, and tap the
checkmark
.
Manage Lightroom presets
If you no longer need a specific custom preset, delete it from your Lightroom account using the steps below.
-
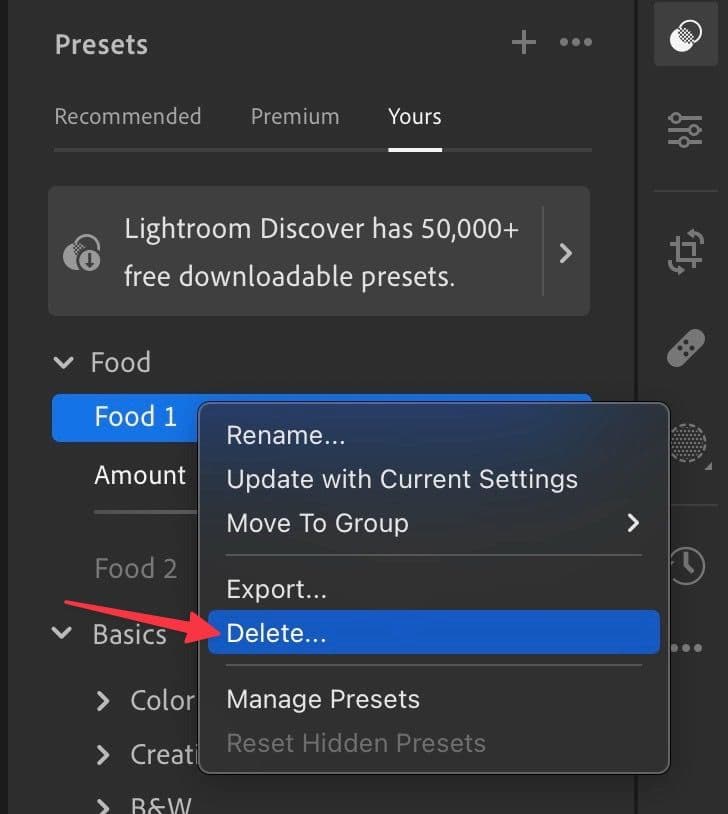
Launch the
Presets menu
in Lightroom. -
Move to the
Yours
tab. -
Right-click on a preset and select
Delete
.
- Confirm your decision. Adobe removes the same from your synced devices.
You can rename and export a preset from the same menu.
One step closer to becoming a pro photographer
Your Lightroom experience is incomplete without presets. To level up your photography skills, read our dedicated post to learn about the top Android apps for photographers.